Showing posts with label Mybeadtherapy. Show all posts

I'm So Excited!

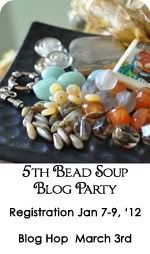
I get to be a participant in the 5th Bead Soup Blog Party on March 3rd!!!

Bead Soup Blog Party

What's that? & nbsp;It's a very cool event hosted by Lori Anderson of Pretty Things. & nbsp;Participants send jewelry making goodies to their bead soup partner. & nbsp;Then they create something fabulous with the pieces they receive and post pics on their blog on the party day (March 3, 2012), and we all hop from blog to blog to see all the fabulous creations everyone made!

You may get to see some "teaser" shots in the interim -- like pics of what I receive and what I sent -- but you just have to wait until the party to see the final reveal.

So I've been mulling over what I will send. & nbsp;I've been partnered up with a fabulous lampwork artist -- Lori Greenberg! & nbsp;Check out her amazing work and her beautiful blog! & nbsp;I love the contrast and color combinations she uses. & nbsp;So very "mod" and ultra-cool! ;)

Well, as they say ... stay tuned!
Heidi

Copper Solder Wire - Lessons Learned

Want to hear a bit about what I learned about sweat soldering with copper solder wire when I made all these guitars & nbsp;that went into official gift lounge bags at the 46th Annual Country Music Awards? & nbsp;Want to watch my YouTube tutorial showing how I work with this new material? & nbsp;Can you believe I managed to video myself soldering one of my guitars without melting or lighting my smartphone on fire?! & nbsp;(Lol - I'm pretty surprised!)

Well, then follow me over to Artisan Whimsy today and see my post as team member of the Metal Group. & nbsp;There you can see pics, read my experiences and tips, and watch my very first YouTube tutorial.

Happy soldering!
Heidi

Prong Challenge - Oh boy!

I have wanted to learn to do prong settings for a while now. & nbsp;So when the Artisan Whimsy Metal Team & nbsp;decided we were going to post a prong setting how-to and a follow up challenge and blog hop, I figured now was as good a time as any.

When the how-to was posted, I saw that the solder media of choice was of the paste variety. & nbsp;Well, of course, I don't have any of that. & nbsp;And I wanted to save my $$ to put toward that disc cutter I've been eyeing. & nbsp;(You know, metal workers will ALWAYS choose tools and convince ourselves that we can "make do" on less than ideal material because it will just be a little more challenging -- not impossible, right?) & nbsp; & nbsp;I have copper solder wire for use when soldering copper pieces. & nbsp;And I have some easy sterling solder wire for use on sterling pieces. & nbsp;And I have loads of stones and fossils I want to set. & nbsp;So I was game to jump right in.

As soon as I considered making prong jewelry, I knew I wanted to try using my twisted rosy tipped ball pins as the prongs. & nbsp;But they needed to be pretty thick. & nbsp;So I tried twisting 16 gauge wire together to form a 14 gauge prong (approximately) and managed to ball the tips just fine. & nbsp;I then trimmed the ball pins down to a short prong length, making sure to cut the prong so that the bottom was flush and straight. & nbsp;I melted the copper solder and then held the prong in place with my locking tweezers while I "sweat soldered" the prong onto the face of the textured plate I cut from copper sheet. & nbsp;Repeat three more times and this is what I got!


I added a hand forged chain of mixed large hammered rings and smaller twisted copper, and hand turned and hammered s-links, too.

Next I decided after one successful try, I was certainly ready to solder prongs onto the sterling silver snowflake I had sawed out, right? & nbsp;Ummm . . . not necessarily! & nbsp;Lol. & nbsp;I struggled getting the silver wire to even melt, let alone flow. & nbsp;I still haven't figured out what happened. & nbsp;Maybe it had to do with the sudden 40 degree drop in temps outside and my studio being several degrees cooler?

I finally managed to get the prongs on. & nbsp;But they were stiff and potentially brittle. & nbsp;I started to gently and slowly bend them over the druzy slice I wanted to mount. & nbsp;The last prong didn't make it. & nbsp;It snapped loose right at the solder joint. & nbsp;No bueno.

So, I was certain the other three would either pop off or would break off because they may be brittle. & nbsp;So I decided it was worth the risk of leaving them in place, covering my whole piece carefully in Firescoff, & nbsp;and trying to very carefully not solder the stone. & nbsp;Just as I was getting the solder to melt and flow just a tiny bit, the stone made a popping sound. & nbsp;a large surface sliver popped off. & nbsp;The druzy crystals on that side also crumbled off like rock salt. & nbsp;Niiiice . . . NOT!


I slid the stone out after carefully prying the prongs open just a bit. & nbsp;I decided to try one more carved piece of stone. & nbsp;I clenched my jaw and tried soldering that fourth prong once more and finally got it to flow and stick. & nbsp;I slid the new stone into the setting and started to push the prongs carefully into place. & nbsp;The newly soldered prong held beautifully. & nbsp;Then one of the other original 3 popped off. & nbsp;Grrr. & nbsp;FAIL!

This will have to wait for a new day . . . maybe a rivet technique and/or some solder paste will be my next attempt. & nbsp;We shall see! & nbsp;But at least I have one nice prong piece to show you! & nbsp;And if the sterling snowflake doesn't work out? & nbsp;Well, I'll just recycle it and use the credits toward more tools! :)
Fresh Start for the New Year

It's a whole new year! & nbsp;So, I'm taking the bull by the horns and doing something I should have done a while ago. & nbsp;I'm moving ...

No, not literally. & nbsp;Though it almost feels like it! & nbsp;

As many of you likely know, Facebook does not allow you to change the title of your business page unless you have less than 100 fans. & nbsp;(When I first tried to change it, they wouldn't let you change it, period. & nbsp;Then they said if you had less than 100 fans, but by then I had more than that.) & nbsp;I made a silly mistake when I first created my page. & nbsp;I named my page with the full website name - as in "www.mybeadtherapy.com." & nbsp;I thought it would help drive traffic to my main website. & nbsp;I did not foresee the evolutions of FB making it so that people could not easily refer others to my FB page because the name would automatically create a link to the outside site. & nbsp;I also did not think about the fact that no one would think to search for a business page that starts with "www." & nbsp;Lol. & nbsp;I'm really not sure how I was ever found by more than 100 people! :)

So, to resolve this issue, the only option was to create a new page. & nbsp;From scratch. & nbsp;And hope -- with all my fingers and toes crossed -- that the bulk of you that have followed my page, supported and encouraged me, and shared with me your pages, too, would follow me over to my new page. & nbsp;Pretty please, with sugar on top?! :)

Come find me, "like" me, and continue to share with me at MyBeadTherapy.
And let's ring in a fabulous New Year together!

A Final Toast to 2011

Whew! & nbsp;2011 is going, going ... gone! & nbsp;I don't know that I hated it enough to say "good riddance" and mean it, but it did cross my mind!

It wasn't all bad, though. & nbsp;I am sure some smart aleck somewhere would say it was "character-building." & nbsp;Frankly though, I think I've had just about all the character I can stand. & nbsp;The last several years have all been years full of "growing pains." & nbsp;I think we are all due at least one year with a little spoiling, don't you?!

2011 did have some wonderful moments & nbsp;wrapped into it. & nbsp;We thoroughly enjoyed a visit by out-of-town family at Thanksgiving. & nbsp;You can't beat a festive combination of fun, family and food!

We did notice on the first evening that it was a bit hard to keep track of who's wine glass was who's since we all kept circulating about between the living room and the wonderful cheese and meat board in the kitchen. & nbsp;Of course, I had not gotten around to making wine charms for our home -- only given them away as gifts to others. & nbsp;(How many of you crafty people have crocheted blankets for everyone else's baby, but none of your kids have one? & nbsp;Oh, that would be me, too!)

So, while my sweet hubby made a fabulous breakfast for everyone the next morning, I slipped down to the studio for a little playtime with my hammers. & nbsp;I emerged with four beautiful wine charms. & nbsp;And we discovered they work great on coffee mugs, too!

I've since filled a couple of orders for personalized charms stamped with party guests' names, family names, and even a set of "toasts" - "cheers," "salute," "sante," and "opa." & nbsp;How fun!

Now you can order a set or two of your own. & nbsp;They are adjustable to fit thick or thin stemmed wine glasses. & nbsp;And since they are hand-forged from heavy gauge copper, they will last infinitely longer than their flimsy counterparts you'll find at the department store. & nbsp;No one wants to throw away their money these days. & nbsp;Invest it instead in something that will last and will serve you for many, many years to come -- be they years of character-building or well-earned comfort and peace!

Cheers to a wonderful year of health, peace, and joy in 2012!